For the best DIY pine cone Christmas decorations for the table, use clean, fully dry cones in three sizes, add one controlled color, and keep the centerpiece low enough for guests to see across it. The most reliable setup is a shallow tray with pine cones, rosemary or fir clippings, and warm-white LED tea lights. It looks festive without blocking plates, glasses, or conversation.
This project costs about $15 to $35 if you already have scissors and a tray. Plan for one hour of active work, plus several hours for drying. The steps below cover cone selection, cleaning, painting, layout, safety, and the mistakes that make homemade table decor look dusty or crowded.
Choose pine cones that suit the table before decorating
Match cone size to the table width
Start with the table, not the craft supply. For a narrow table under 36 inches wide, choose cones between 2 and 4 inches long. Larger cones quickly make the centerpiece look bulky. On a dining table 40 to 48 inches wide, mix 3-inch cones with six to eight larger cones measuring 5 to 7 inches. A wide buffet or sideboard can handle 8-inch cones, but those belong in a separate display rather than at every place setting.
Collect 15 to 25 cones for a six-person table. That gives you enough pieces to reject cracked, moldy, or badly opened cones. Pine cones with intact scales hold paint and glue better than cones with loose flakes. Pick a mix of open and partly closed cones so the display has different shapes instead of a row of identical pieces.
Use a simple quantity rule
Measure the usable center section of the table in inches and divide by two. That number is a good starting count for medium cones. A 48-inch table needs about 24 cones for a full natural runner, or 12 cones for a sparse tray display. Keep at least 6 inches clear at each end and leave a 12-inch-wide space around serving bowls.
| Table setup | Recommended cones | Best arrangement |
|---|---|---|
| Four-person, 36-inch table | 12 to 16 cones, 2 to 5 inches | One shallow tray |
| Six-person, 48-inch table | 18 to 25 cones, 3 to 7 inches | Runner or three small clusters |
| Eight-person, 60-inch table | 25 to 35 cones, 3 to 8 inches | Long runner with spaced accents |
Best choice: use three clusters for a family dinner and a continuous runner only when the table has plenty of serving space. Clusters are easier to move when someone needs to set down a casserole.
Clean and dry pine cones before adding paint or glue

Remove dirt without crushing the scales
Shake each cone outside, then brush it with a dry toothbrush. Work from the base toward the tips so the scales stay attached. Do not soak dusty cones in a bowl and leave them there. Wet cones close tightly, hide dirt inside, and take much longer to dry. If you find insects, webbing, or a musty smell, discard that cone. A decorative centerpiece is not a good place to take chances with pests.
For cones with sticky sap, place them on a baking sheet lined with foil and warm them at 200°F for 30 minutes. Open a window and never leave the oven unattended. Let the cones cool completely before handling them. Heat can make some cones open, which is useful, but it can also release a strong resin smell.
Dry them long enough to prevent mold
Arrange the cleaned cones in one layer on cardboard or a wire rack. Leave them in a warm, dry room for 24 to 48 hours. Turn them once halfway through. They are ready when the base feels dry, no cool dampness remains in the center, and a paper towel stays clean after you rub the cone.
Do not seal a damp cone under paint. The trapped moisture can create a sour smell and dark spots. This is the most common reason a natural centerpiece looks fine on Christmas Eve and unpleasant by New Year’s Day. Drying is part of the decoration process, not a minor prep step.
Verdict: collect more cones than you need, discard questionable pieces, and give the survivors a full two-day drying window when the weather is humid.
Compare three pine cone table layouts before you commit
The table is the deciding factor
There is no reason to make one large centerpiece when the table needs to hold food. Compare these layouts with your actual plates and serving bowls in place. The best option is the one that keeps the decoration visible but never forces guests to reach around it.
| Layout | Materials | Work time | Best use | Main drawback |
|---|---|---|---|---|
| Shallow tray cluster | 12 to 18 cones, tray, LED tea lights | 25 minutes | Four- to six-person dinner | Less dramatic on a long table |
| Natural runner | 25 to 35 cones, greenery, orange slices | 40 minutes | Long table with food at the ends | Pieces can spread during service |
| Individual place accents | One cone, napkin ring, name card per guest | 30 minutes | Formal meal or small table | Uses more glue and prep time |
Choose the winner for your dinner
Pick the shallow tray cluster for a normal family meal. It has the best balance of style, safety, and cleanup. Pick the natural runner only when the table is at least 60 inches long and the main dishes will not sit in the center. Pick individual accents when guests need clear space for plates and you want the decoration to double as a place card.
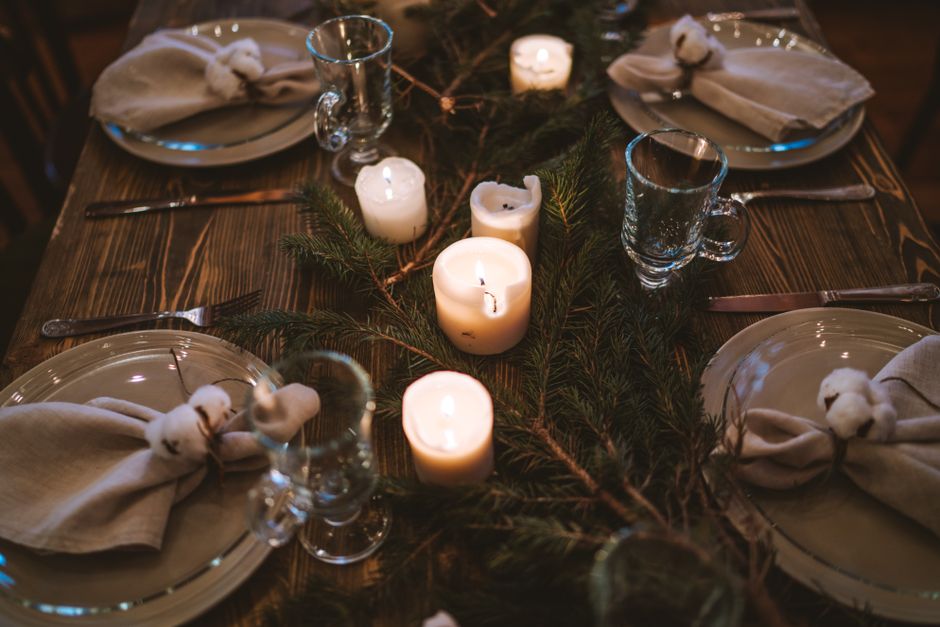
Battery LED lights are safer than open flames around dry cones. Use two to four warm-white lights in a tray, hide the battery packs under greenery, and switch them off before storing the centerpiece. Avoid tall candles, especially taper candles. A flame beside dry resin and paper napkins creates risk for very little visual gain.
Verdict: use the tray cluster unless you have a long table and a separate serving surface. It is the most useful design for real holiday meals.
Fix the pine cone decoration mistakes guests notice first

Why do the cones close after cleaning?
Moisture makes pine cones contract. If a cone closes, spread it on a rack in a dry room and wait another 24 hours. Do not force the scales open with a knife. That breaks the structure and leaves sharp fragments on the table.
Why does the centerpiece smell or shed?
A smell usually points to damp cones, excess sap, or paint that has not cured. Remove the affected piece instead of covering it with fragrance. Shedding often comes from old cones, thick spray coats, or rough handling. Brush loose scales away before assembly and lift the finished arrangement by its tray, not by the cones.
What should stay out of the arrangement?
Skip fresh berries that can stain linens, loose glitter that can reach food, and scented oils that may irritate diners. Avoid moss gathered from a roadside or park because it may carry dirt and insects. Use dried fruit only when it is fully dry and not soft at the center.
The clearest fix is to edit the arrangement. Remove one-third of the pieces, lower the tallest cone, and leave more empty space. A centerpiece usually looks better after subtraction.
Verdict: if a cone smells damp, sheds heavily, or has visible mold, throw it away. A replacement cone costs nothing compared with cleaning a tablecloth or ruining a meal.
Buy only the supplies that improve the finished table
The practical shopping list
You need 15 to 25 clean pine cones, a tray, cardboard for painting, a toothbrush, scissors, and one roll of floral wire or twine. Add white or gold paint only if your table needs color. Add four warm-white LED tea lights for evening meals. This keeps the basic project near $15 if you forage the cones and already own a tray.
Buy the Gorilla Hot Glue Gun when you need a firm bond for wood ornaments or a heavy ribbon. Choose Aleene’s Original Tacky Glue when you want more control on small details. Buy Rust-Oleum Painter’s Touch 2X Ultra Cover for a quick matte spray finish, or Krylon ColorMaster Paint + Primer when you want a separate primer-and-color product in one can. Prices vary by store, so treat the figures as a planning budget rather than a fixed checkout total.
When not to buy extra craft supplies
Do not buy a glue gun for a loose natural arrangement. The cones, tray, and LED lights are enough. Do not buy spray paint when children will help indoors or when you have no ventilated outdoor workspace. Do not buy a large decorative tray if your table already has a centerpiece bowl that can hold the cones. Use what you own first.
Skip this project completely if your dinner needs every inch of table space, if anyone in the home reacts to resin or paint fumes, or if the table will sit beside an open fireplace. In those cases, choose paper snowflakes, fabric napkin rings, or a washable ceramic bowl instead. Those options give the table a Christmas look with less loose material and less fire risk.
For most holiday dinners, buy or gather the cones, clean and dry them for two days, then make a low tray cluster with matte white accents and LED tea lights. That specific setup gives you the strongest result for the least work, and it remains easy to move when the food reaches the table.