
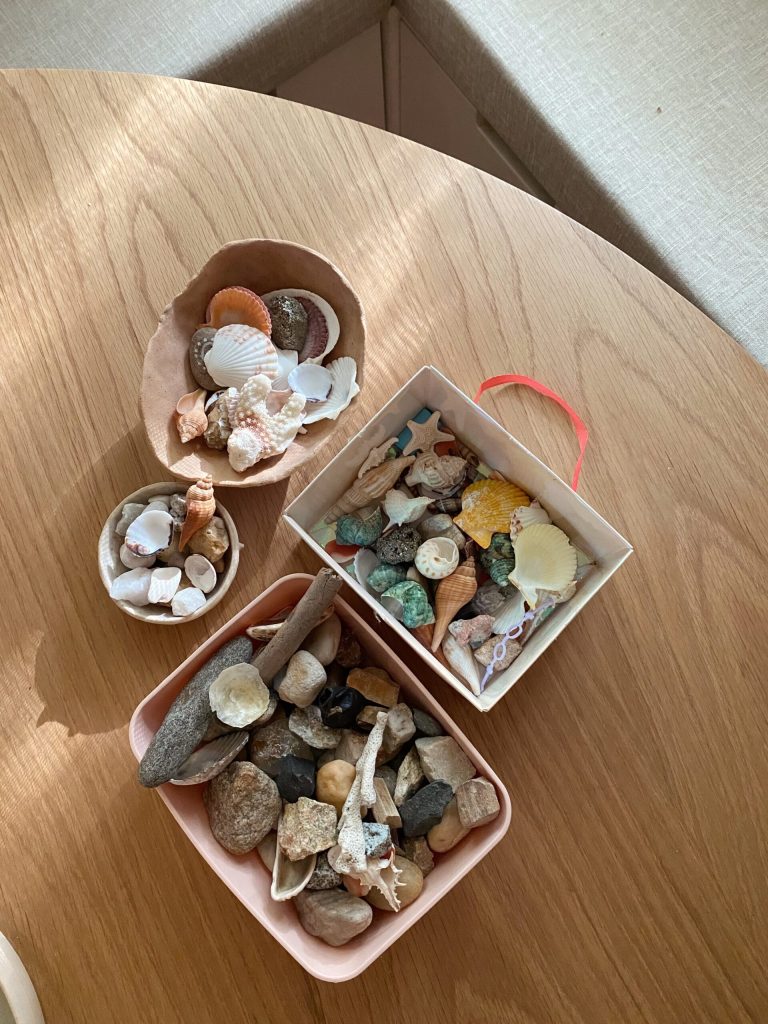
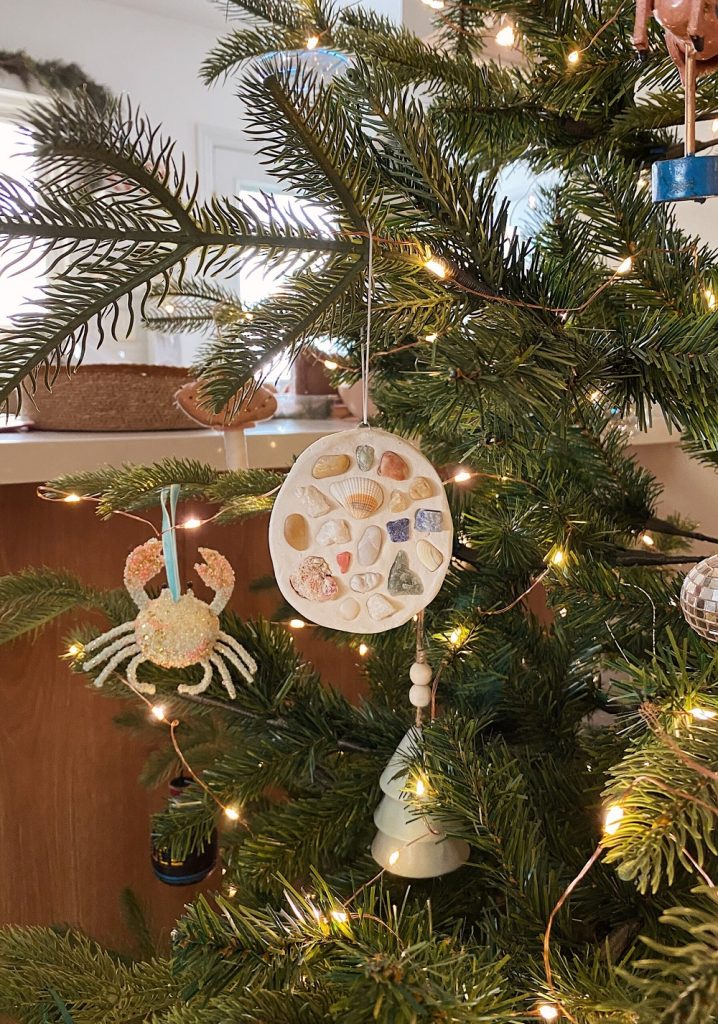
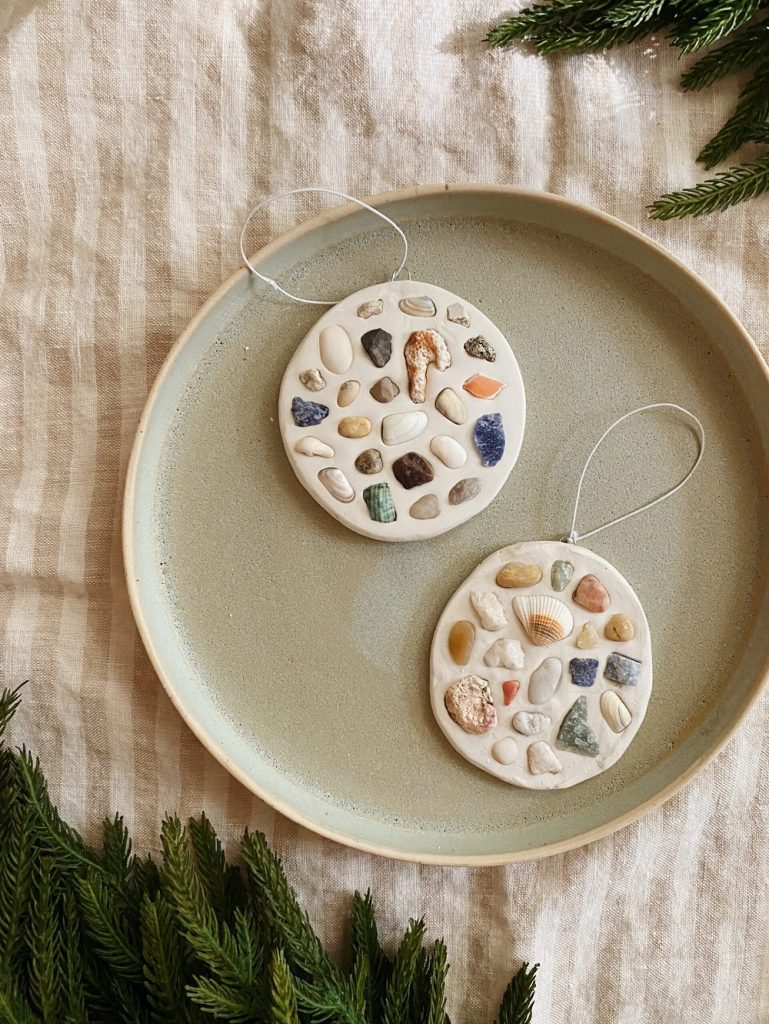
we just have little boxes and boxes of these things — so i thought it would be really sweet to make mosaic ornaments of some of them and they would be like all our vacations and memories all in one ornament!
would also be so cute to do this with a collection from one trip, and mark where on the back so you remember each one.
anyway, i’m calling these treasure ornaments they make me so happy!
you could totally do these with salt dough or air dry clay but i chose oven bake polymer clay because time is limited and i wanted it done quickly.
materials
POLYMER CLAY
a bunch of little shells/rock/crystals
ROLLING PIN
wire or paper clip for loop
string or ribbon for hanging

directions
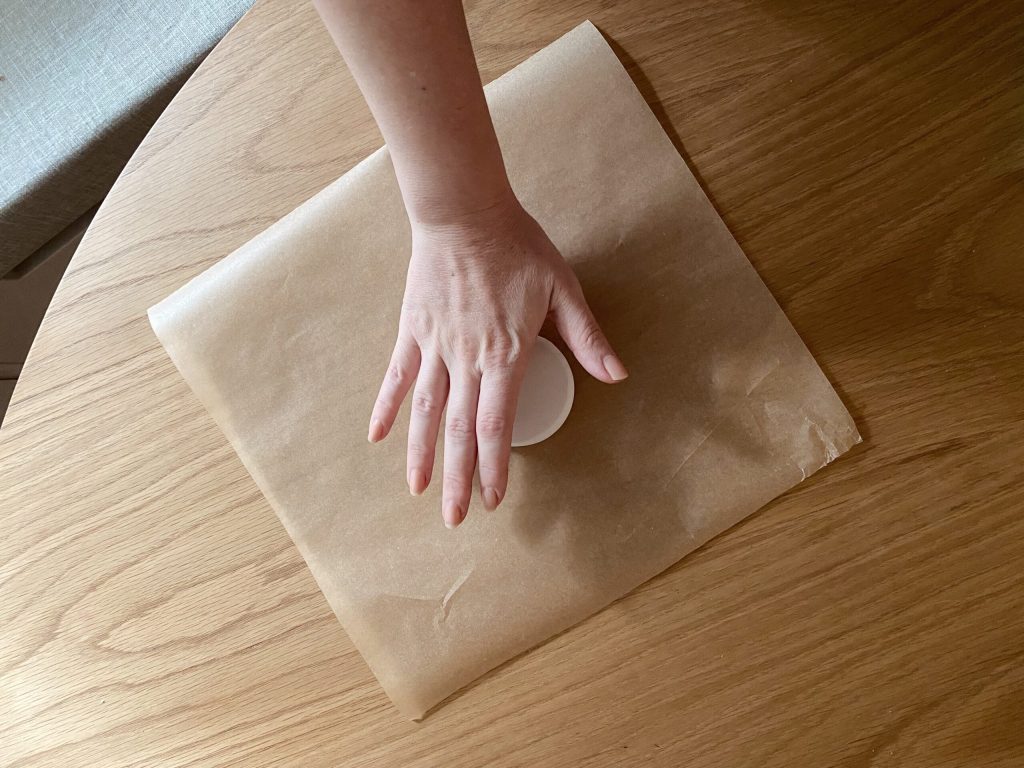
- condition and roll your clay into a ball. smoosh it with your hand and then roll it flat. finesse edges if needed but i like it looking a little handmade.
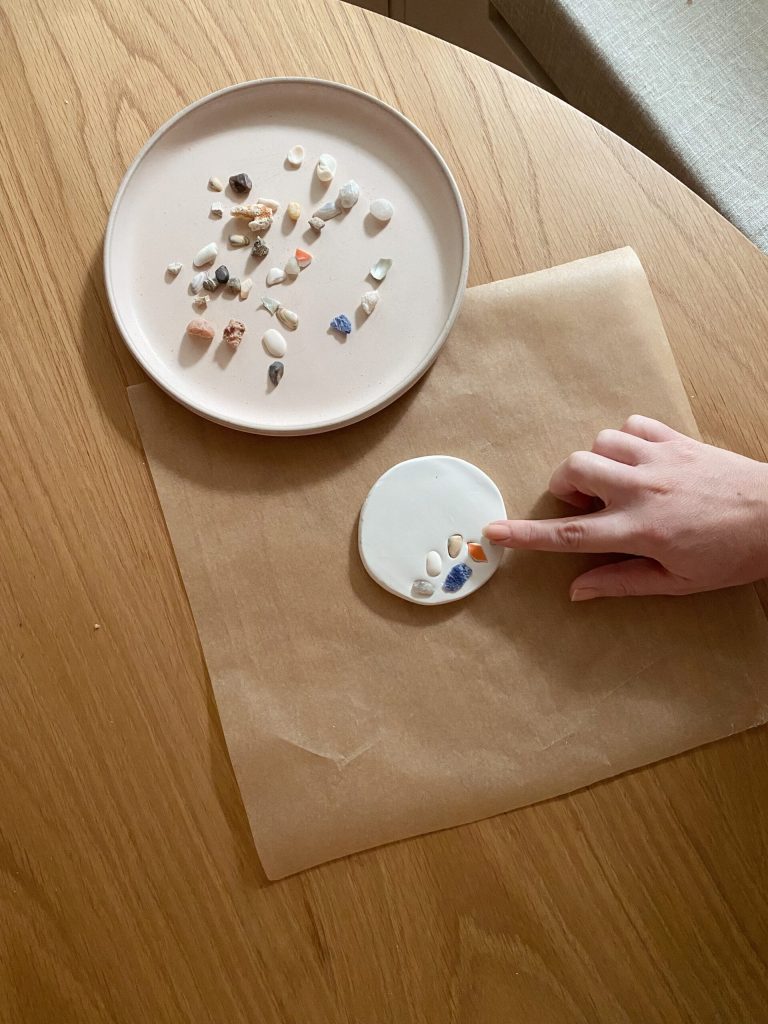
- carefully start pressing your little shells into the clay. if you want to follow a plan, you can arrange them on a different surface first, i just winged it. press them in pretty firmly so they’ll stay put.
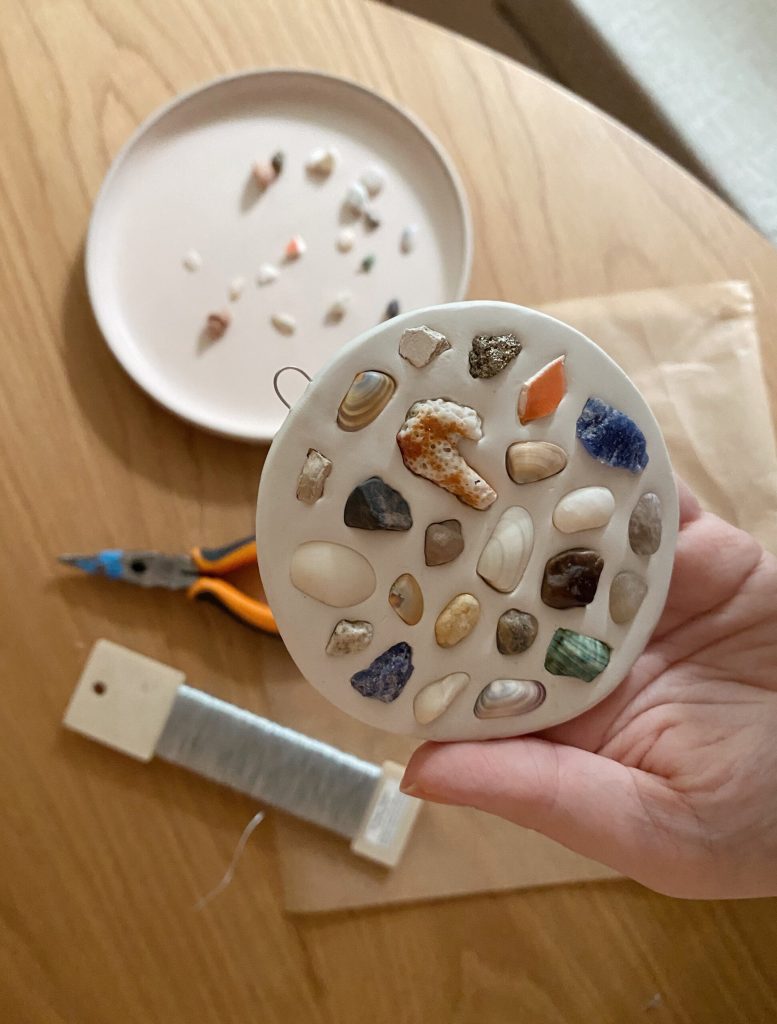
- make a U out of a paper clip or wire and carefully insert into the top of your clay.
- bake according to package directions.
- once cool, add string or ribbon to your ornament and hang!
a few little notes :
they seem pretty sturdy right now, but if any piece were to fall out i don’t see why i couldn’t superglue and stick back on.
someone asked if they were too heavy to hang, they aren’t really any heavier than some of our other ornaments! probably because the shells themselves are tiny.
if you need more tiny pieces, you can hit a crystal or shell with a hammer and create them!


